<VS Code 설치>
https://code.visualstudio.com/download
Download Visual Studio Code - Mac, Linux, Windows
Visual Studio Code is free and available on your favorite platform - Linux, macOS, and Windows. Download Visual Studio Code to experience a redefined code editor, optimized for building and debugging modern web and cloud applications.
code.visualstudio.com
이 사이트를 들어가서
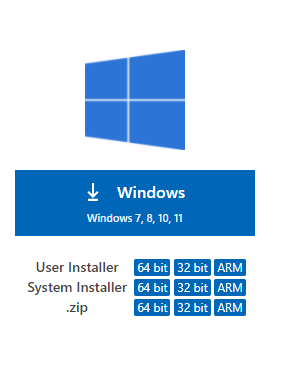
이걸 눌러서 다운 받습니다.
그리고 나서

라이선스 계약서에 동의합니다를 누르고 다음을 누르면

아시죠? 이런 폴더 위치에 민감한거 하지만 그냥 우선 넘어가시면 됩니다.

넘어갑니다.

원래는 밑에 두 항목만 선택되어 있는데 저는 나머지 항목도 모두 필요하기 때문에 모두 선택한 후 다음을 눌러줍니다.

마지막으로 설치 위치와 시작메뉴 폴더, 선택항목을 모두 확인한 후 설치를 눌러줍니다.

설치를 완료했습니다.
이제 다음 단계로 넘어가보겠습니다.
VS Code에서 C/C++를 눌러 설치를 하고

<MinGW설치>
VSCode는 컴파일러가 필요하기 때문에 밑에 사이트에 들어가서 다운을 해줍니다.
https://sourceforge.net/projects/mingw/files/
MinGW - Minimalist GNU for Windows - Browse Files at SourceForge.net
×
sourceforge.net
다운을 하면 이런 화면이 나옵니다.
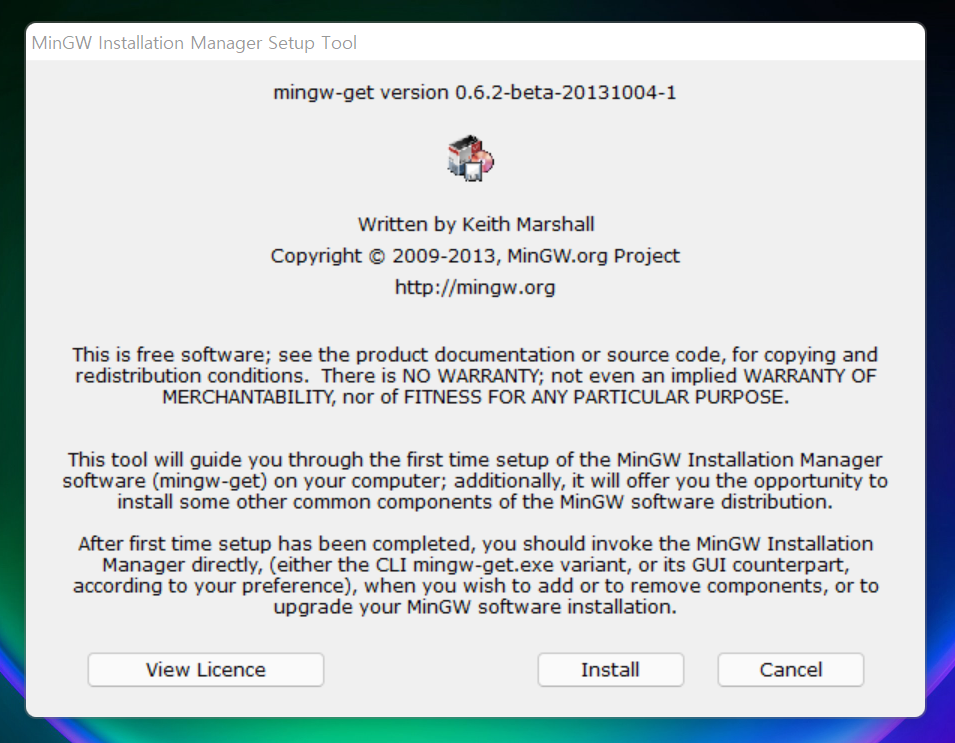
우선 Install를 눌러 다운을 받아줍니다.

아무런 수정 없이 그냥 바로 Continue를 눌러줍니다.

다운이 진행되고 있습니다.
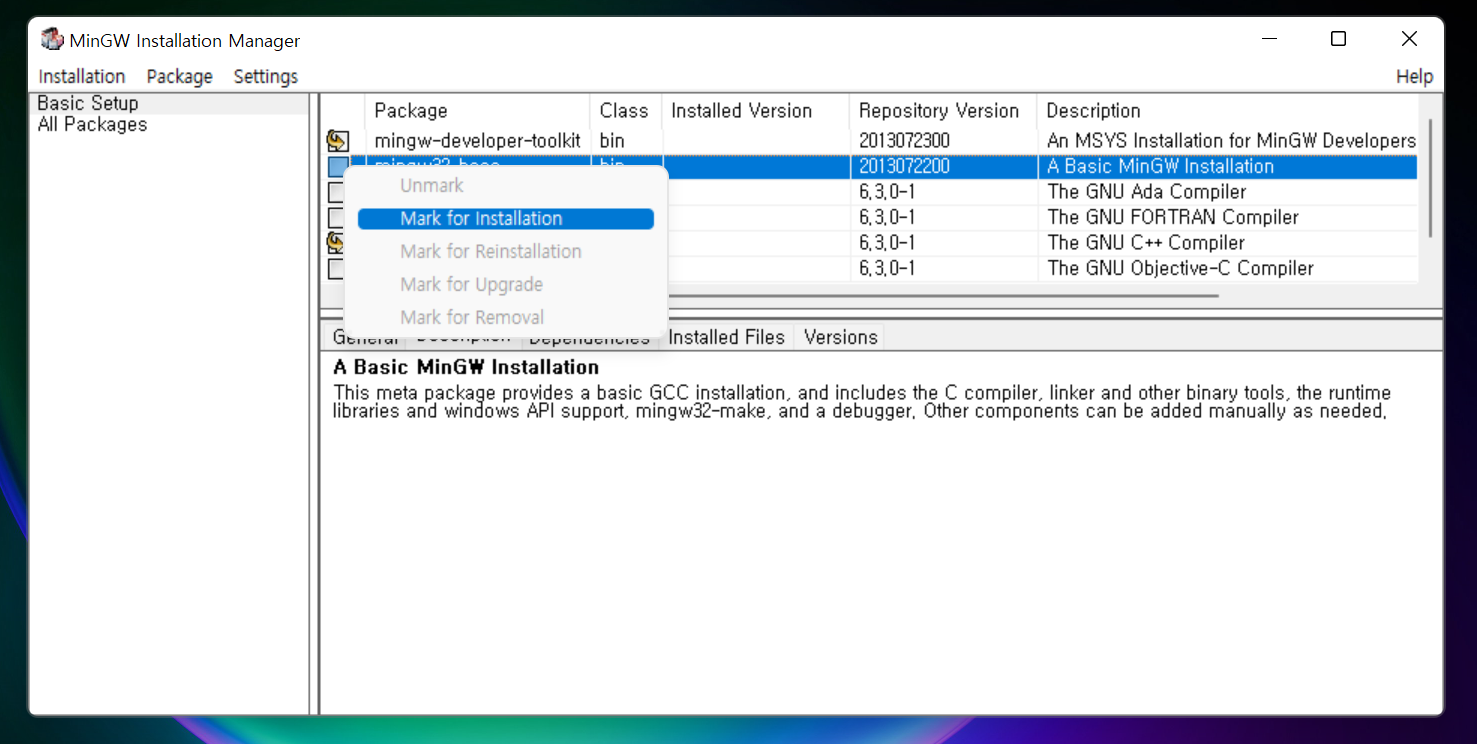
우선
mingw-developer-toolkit
mingw32-base
mingw32-gcc-g++
이렇게 세개를 클릭한 후에 (
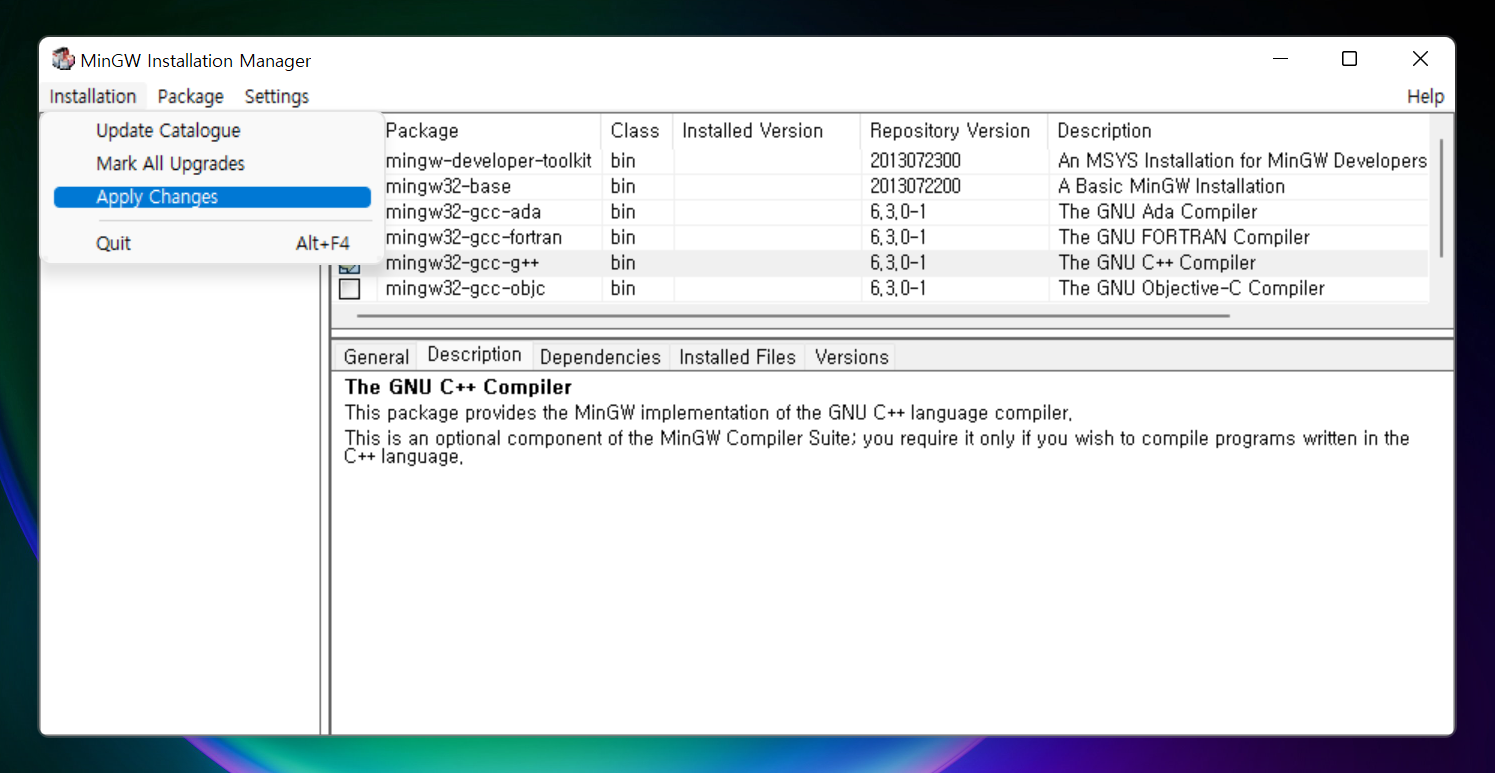
Apply Changes를 눌러주고 밑에 사진 처럼 화면이 나오면

Apply를 눌러 다운로드를 합니다.

다운로드가 진행되고

Close를 눌러줍니다.
<환경 변수 설정>
윈도우키를 누르고 환경을 치면 시스템 환경 변수 편집이 나옵니다. 눌러서 들어가면

그럼 시스템 속성에 들어가서 환경 변수가 보입니다.

눌러주고

이런 화면이 나옵니다. 그러면 시스템 변수에서 path를 눌러

새로 만들기를 눌러 C:\MinGW\bin 이렇게 적어 추가해줍니다.
아까 한 것을 확인하기 위해

윈도우 + r를 눌러서 cmd창을 들어가줍니다.

cmd창을 들어가서 gcc -v를 쳐서 확인해주고
다음 g++ -v를 쳐서 확인해줍니다.
그리고 VS Code에 들어가서
<파일 코드 수정>
Ctrl + Shift + P이나 f1을 눌러서 c_cpp_properties.json를 들어가서 수정을 해야합니다.
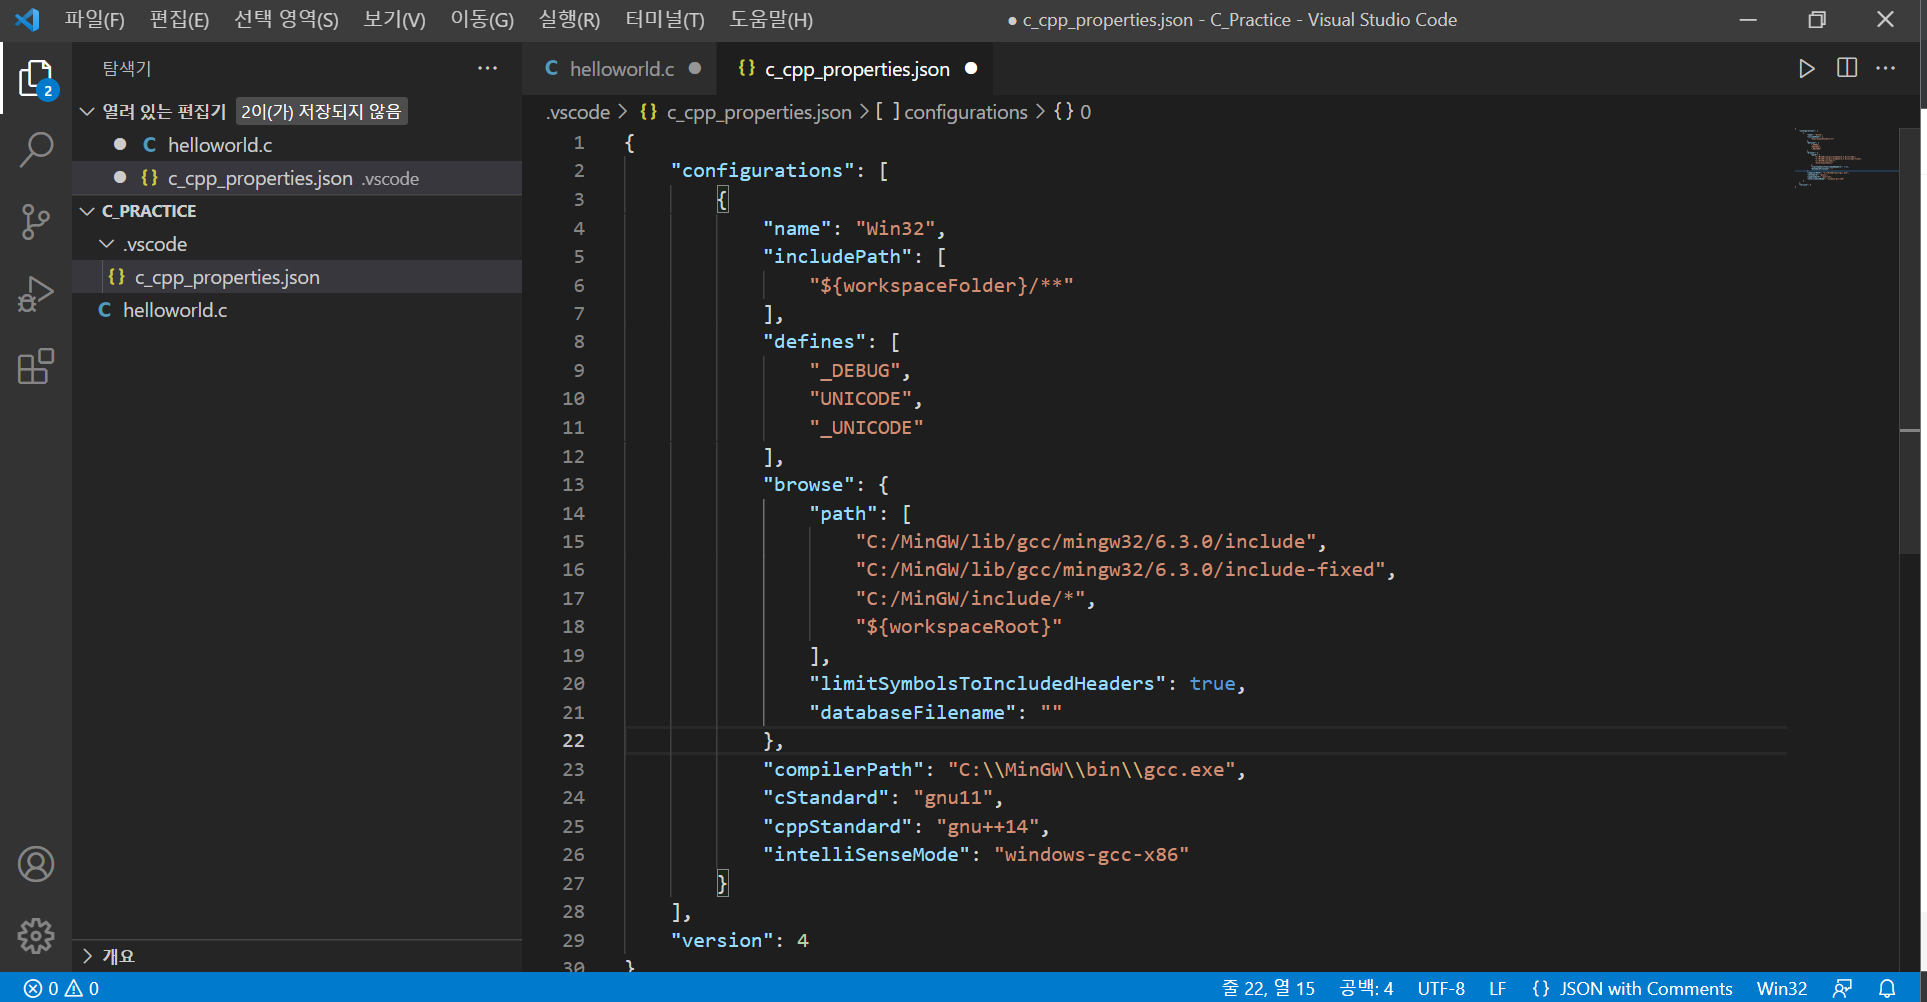
defines와 compilerPath사이에 아래 코드를 추가해줍니다.
"browse": {
                "path": [
                    "C:/MinGW/lib/gcc/mingw32/6.3.0/include",
                    "C:/MinGW/lib/gcc/mingw32/6.3.0/include-fixed",
                    "C:/MinGW/include/*",
                    "${workspaceRoot}"
                ],
                "limitSymbolsToIncludedHeaders": true,
                "databaseFilename": ""
            },
그 다음 다시 f1을 눌러

Tasks: Configure Task을 눌러서 tasks.json파일이 생성됩니다. (저는 Other을 눌렀습니다.)
{
    // See https://go.microsoft.com/fwlink/?LinkId=733558
    // for the documentation about the tasks.json format
    "version": "2.0.0",
    "runner": "terminal",
    "type": "shell",
    "echoCommand": true,
    "tasks": [
        {
            "label": "save and compile for C++",
            "command": "g++",
            "args": [
                "${file}",
                "-o",
                "${fileDirname}/${fileBasenameNoExtension}"
            ],
            "group":"build",

            "problemMatcher":{
                "fileLocation":[
                    "relative",
                    "${workspaceRoot}"
                ],
                "pattern":{
                    "regexp": "^([^\\\\s].*)\\\\((\\\\d+,\\\\d+)\\\\):\\\\s*(.*)$",
                    "file": 1,
                    "line": 2,
                    "column": 3,
                    "severity": 4,
                    "message": 5
                }
            }
        },
        {
            "label": "execute",
            "command": "cmd",
            "group": "test",
            "args": [
                "/C","${fileDirname}/${fileBasenameNoExtension}"
            ]
        }
    ]
}
이 코드를 이용하여 수정해줍니다.
단축키를 설정 해야하는데요
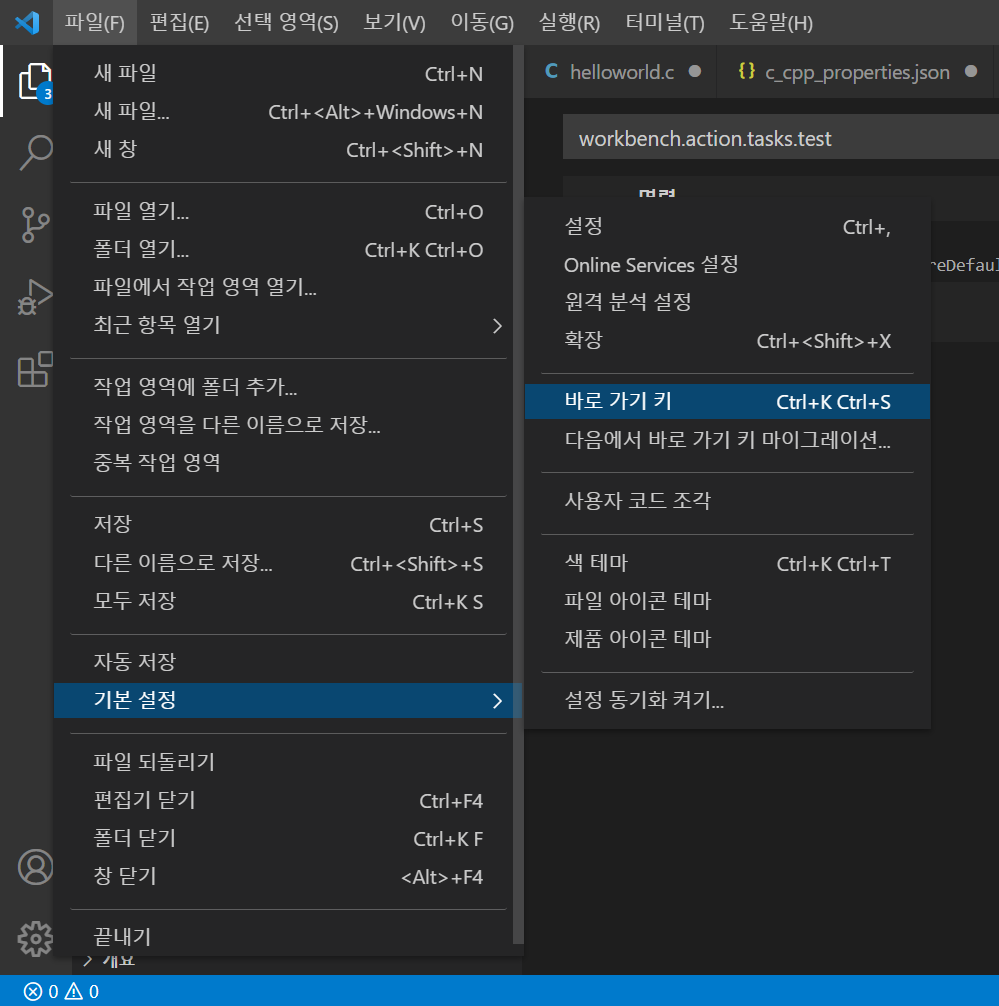
파일 -> 기본설정 -> 바로가기 키 -> workbench.action.tasks.test 눌러서

Ctrl + <Alt> + c를 눌러서 저장합니다.

helloworld.c을 만들어서 helloworld를 출력해줍니다.
ctrl+shift+B를 눌러 빌드해주고, ctrl+alt+C를 눌러 실행해줍니다.

밑에 helloworld가 출력되는 걸 보실 수 있습니다.
⭐설치하는데 많은 도움을 받은 주소⭐
https://0netw0m1ra.tistory.com/3
[VScode] Windows10. Visual Studio Code(VS Code) C/C++ 설치
(Windows10 기준) 1. VS Code를 먼저 설치합니다. code.visualstudio.com/download 2. VS Code를 실행시키고, c/c++을 설치합니다. 3. C/C++을 위해 컴파일러를 설치합니다. VS Code는 컴파일러를 지원하지 않으..
0netw0m1ra.tistory.com
https://webnautes.tistory.com/1158
Visual Studio Code에서 C/C++ 프로그래밍( Windows / Ubuntu)
Windows와 Ubuntu 환경에 설치된 Visual Studio Code에서 C/C++을 컴파일하고 실행시키는 방법에 대해 설명합니다. 테스트에 사용한 운영체제 버전은 Windows 10과 Ubuntu 20.04입니다. Visual Studio Code 버전에..
webnautes.tistory.com
'Setting' 카테고리의 다른 글
| Dev-C++ 테마 변경하기 (0) | 2020.03.27 |
|---|